Making great wine or brandy is hard. Off-flavors, stalled fermentation, and leaky gear waste time and fruit. The fix? Use a well-matched still, sanitary tanks, and solid temperature control built for winemakers.
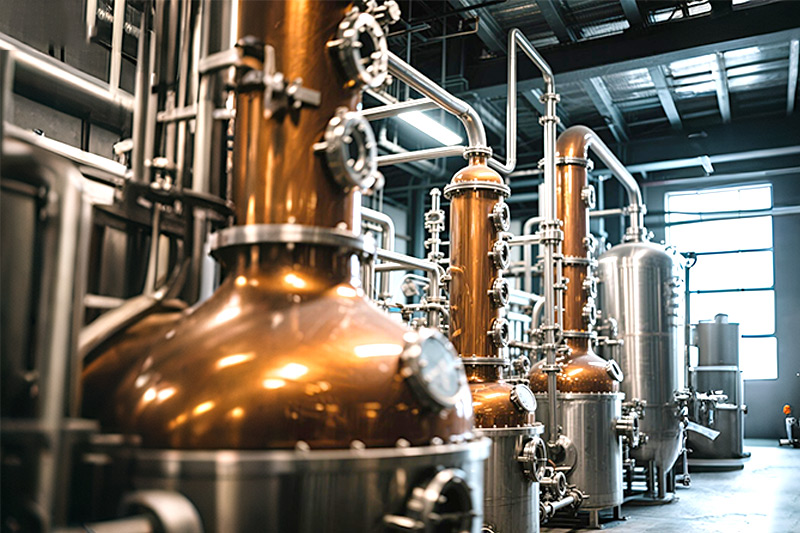
Distillation equipment for wine making includes a fermenter, a pot still or hybrid still with a copper head and condenser, transfer lines and stainless steel filters, plus pumps and controls. Start by fermenting clean must, then distill to concentrate aroma for brandy or fortification, observing local laws and safety.
As a brewing equipment manufacturing plant serving wineries, cideries, and craft producers, we design and build stainless systems every day. Below you’ll find a clear, practical guide that blends field experience with simple explanations so you can choose the equipment you need with confidence.
What exactly is “distillation equipment for wine making”?
When people say distillation equipment for wine, they usually mean a complete path: a sanitary fermenter to create fermented wine, a still (commonly a pot still) sized for your batch, copper surfaces for sulfide cleanup, a shell-and-tube condenser, and safe transfer to a tank or wine bottle. Together, these parts help you distill aromas gently without shredding delicate fruit notes.
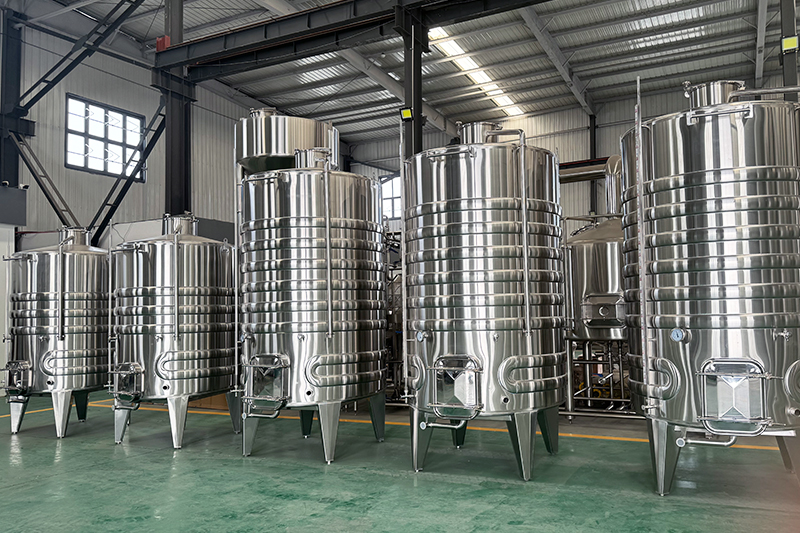
For commercial work, look for welded sanitary fittings, accurate temperature control, and CIP (clean-in-place) ports. If you also brew beer or make cider, shared utilities (glycol, steam, power) keep costs low. See our purpose-built wine making equipment for layouts that integrate tanks, controls, and piping in one line.
Pot still vs column still for brandy and neutral spirits—what should you choose?
A pot still shines when you want weight and fruit expression—perfect for brandy. It carries congeners that smell like ripe stone fruit or baked apple. A tall fractionating column strips more, yielding cleaner spirit closer to vodka. Many wineries run a pot with a short rectification stage for balance.
Quick comparison
| Use case | Best choice | Why |
|---|---|---|
| Fruit-forward brandy | Pot still | Preserves esters and body |
| Fortification spirit | Pot or short column | Moderate rectification, keep aroma |
| Neutral base (spirits like vodka) | Taller column | Higher purity, lighter flavor |
If you expect seasonal peaks, pick a modular system. You can start pot-mode for small batches and later add plates. For reference builds and sizes, browse our distillery equipment (300 L class) and the 600 L line of commercial distillery equipment.
How does fermentation shape flavor before you distill?
Distillers say: “The still can’t fix a bad ferment.” The yeast strain, nutrients, oxygen, and temperature control determine the flavor pool you later concentrate. For fruit wines, gentle nutrient addition and clean, cool ferments build floral esters you’ll capture when you distill. A lidded carboy works for trials; jacketed tanks scale reliably.
Aim for steady temperatures; avoid hot spikes that create fusels. Use a fermenter with a glycol jacket and racking arm so you can transfer pump clear mash or wine off the lees without dragging solids. If you’re planning mixed operations (cider one week, wine next), consider a tapered, dimple-jacketed stainless steel wine fermentation tank sized to your press.
What size still and tanks fit your throughput?
Sizing starts from fruit intake and turns per week. For example, if you can press 2,000 L of wine daily and want one stripping and one spirit run per batch, a 400–600 L still matches many winery schedules. Keep fermenters 20–30% larger than your expected fill to manage foam. If you also run homebrew pilots, isolate valves so small trials don’t disrupt production.
As demand grows, a modular platform lets you swap in a 1,000 L kettle or plate section. Explore our 1,000 L alcohol distiller build for typical floor space, power, and condenser sizing: alcohol distiller (1000 L).
Copper, stainless, and the parts that matter: kettles, heads, and condenser
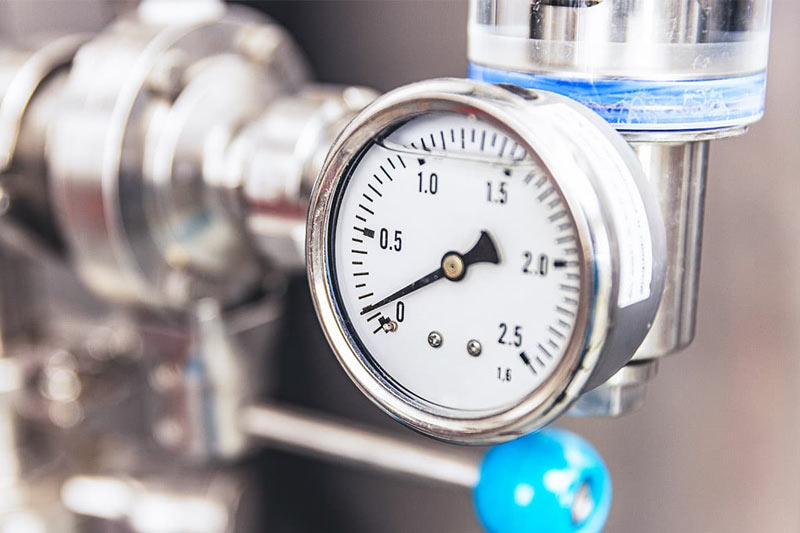
Copper at the vapor path (helmet, lyne arm, dephlegmator) reduces sulfur. Stainless jackets and kettles give strength and easy cleaning. The condenser should match heat duty; oversized is safer than undersized. Include a spirit-safe or parrot with temperature-corrected hydrometer for alcohol content checks.
Don’t forget sanitary polish and stainless steel filters for transfers to maturation or bottling. For hybrid work (wine today, home brew beer tomorrow), tri-clamp manifolds and butterfly valves reduce changeover time.
Moving wine safely: pumps, hoses, and that “110v electric wine transfer pump”
Winery safety means no lifting brutes of liquid. A food-grade, self-priming pump saves backs and spills. For small cellars, an 110v electric wine transfer pump is a handy cart unit that moves must, settled wine, or low-proof distillate between tanks. It’s quiet, gentle, and perfect for tight spaces.
You’ll still want a heavier CIP or flexible-impeller transfer pump for higher-viscosity fruit mashes or when you need longer hose runs. Pair quick-connects with color-coded hoses and camlocks to keep paths clear and sanitary. If you’re kitting a mixed-ferment facility (wine, cider, kombucha), our stainless steel conical fermenter lineup keeps flows organized across products.
Controlling heat: why temperature control changes everything
Esters form in the tank, not the still. Holding a tight band—say 16–20 °C for many wine yeast strains—delivers brighter fruit and fewer solvent notes. Later, on the distiller, stable coolant and heat input protect delicate aroma.
Fermentation Temp vs. Aroma (illustrative)
Esters ↑ |■■■■■■■■ 18 °C sweet/fruit
Balance  |■■■■■■  20 °C
Fusels ↑ |■■■     24 °C hot/solventy
Good temperature control also lets a home winemaker repeat results, from homemade wine to professional runs. Jacketed tanks, inline sensors, and basic PLCs are affordable now, and they match well with our winery-sized distillery equipment (500 L).
Legality, safety, and quality: read this before you distill
In many countries, home distilling without permits is restricted or illegal, even if you make wine legally. Commercial plants must follow fire, pressure, and excise rules; check your local alcohol authority and building code. Learn the difference between potable and non-potable uses. Avoid DIY moonshine hacks—improper cuts can harm people and brands.
Authoritative resources include U.S. TTB spirits regulations and the EU’s food hygiene framework. For practical cellar safety, industry journals like Wine Business Monthly share incident lessons you can apply. When in doubt, ask your local distillery or inspector.
From fermentation to barrel: the simple equipment you need
Here’s the lean backbone most wineries adopt:
- Fruit handling and press into a jacketed fermenter
- Nutrients (yeast nutrient), selected wine yeast, oxygen management
- Stripping run in a pot still, then spirit run
- Proofing and polishing through stainless steel filters
- Oak maturation (oak chips or cubes for trials)
- Bottling into a single wine bottle format for release
Table: minimal “equipment you need” to get started
| Step | Item |
|---|---|
| Start | Sanitary hoses, home brewing supplies, T-clamps |
| Ferment | Jacketed tank or carboy, temp controller |
| Distill | Kettle + copper head + condenser |
| Move | Mobile cart with transfer pump |
| Finish | Filter housing, gauging glass, proof hydrometer |
If you also brew or craft spirits like eau-de-vie, align utilities and floor drains from the start. A compact line like our alcohol distillery equipment for sale (200 L) shows how much fits in a small footprint.
Kits, “making supplies,” and when to go pro
Curious teams often test with a wine making kit or winemaking kit to learn racking, nutrient timing, and fining. Wine making starter kits pack the basics—airlocks, hydrometer, siphon—and help you ferment cleanly. They’re fine for pilots, but stainless lasts and cleans better on scale.
You might also explore beer making supplies, mead making supplies, and home brewing ingredients for pilot R&D. The overlaps are big: tanks, hose, clarifiers. That said, winery-grade valves, gaskets, and surface finishes pay off in fewer infections and faster turns.
Flavor shaping: cuts, maturation, and finish
Careful heads/hearts/tails decisions are the art of the distiller. Fruit wines like pear or grape often show best with conservative reflux and slow spirit runs. For quick trials, you can age in glass with oak chips for weeks, or go bigger with barrels for months to years. Always record starting proof and alcohol content at each stage so you can repeat winners.
If you bottle a fortified home wine or a mature brandy, polish but don’t erase character. Gentle filtration and time do wonders.
Cost, scale, and path to market
Capital grows with volume. A starter layout—one kettle, one small column, two jacketed tanks, a mobile pump—gets you producing. As a plant that fabricates brewing equipment and winery hardware, we see fastest ROI when teams right-size utilities and standardize parts. That means one seal kit, one valve format, one control panel style.
If you plan to add kombucha or cider lines for tasting-room variety, you can reuse key assets. For example, a 20 hL tank and a universal pump jump between products easily; browse our flexible kombucha brewing equipment for vessel ideas that also play well in wine/cider.
Case snapshot: winery-cider producer leveling up
A small hillside winery wanted to fortify a dessert release and capture surplus apple aromatics as brandy. We paired a 400 L pot still with two 20 hL jackets and a compact cooling stack. Training focused on clean fermentation, slow spirit runs, and safe handling. They now run seasonal brandies and a fortified series, moving gently with a cart-mounted transfer pump between stations.
Their next step is a plate add-on to chase lighter profiles. When ready, they’ll slot in without new floor drains or panels—a key benefit of modular builds like our affordable distillery equipment (400 L).
FAQ
Is it legal to distill at home if I already make wine?
Rules vary widely. In many places, distilling at home is restricted even if you legally make wine. Contact your regulator before you distill anything for potable use.
What’s the best first upgrade—tank or still?
If your fermentation drifts, fix control first. Better temperature control and a sanitary fermenter usually improve flavor more than a new still.
Can I start with small batches and scale?
Yes. Many teams pilot in a 100–200 L kettle, then add modular plates or a larger kettle later. Keep utilities and piping standardized so growth is painless.
What about pumps—do I really need two?
One light cart (think 110v electric wine transfer pump) plus a stronger cellar pump covers most tasks. Choose food-grade housings and quick disconnects.
Can I use my beer tanks for wine and distilling?
Often. Sanitary stainless fits all. Just plan separate hoses and a cleaning SOP. If you also bottle beer, your filler can help with small runs, but wine bottling has extra closure needs.
What consumables should I keep on hand?
Gaskets, clamps, yeast nutrient, lab glass, hydrometers, and fittings—plus testing jars and a few trial staves or oak chips or cubes for aging experiments.
Glossary quick hits
- Distill / Distillation: Heat a liquid to vapor and condense it back to separate components.
- Still: The kettle, head, and condenser assembly that performs separation.
- Fermentation: Yeast consumes sugars, creating alcohol and aroma.
- Pot still: Traditional batch still ideal for characterful brandy.
- Fermenter: Vessel for clean, controlled ferment.
- Alcohol distiller: A full rig sized for commercial throughput.
Key takeaways
- Build from clean fermentation first; the still can only refine what’s there.
- Pick pot still for expressive brandy; add plates for lighter styles or vodka.
- Invest early in temperature control, sanitary design, and gentle pumps.
- Size tanks and kettles to your schedule; modular gear protects future growth.
- Respect laws and safety; align with regulators before you distill.
- Use internal resources to compare real systems before you buy.